The Nilon Payments plug-in is installed via the WooCommerce interface and allows opening the Payment Page payment form of Nilon for customers and ensuring all necessary actions for payment processing with regard to the interaction with both customers and the Nilon payment platform (with all necessary information sent and received).
Steps to install Nilon Plugin:
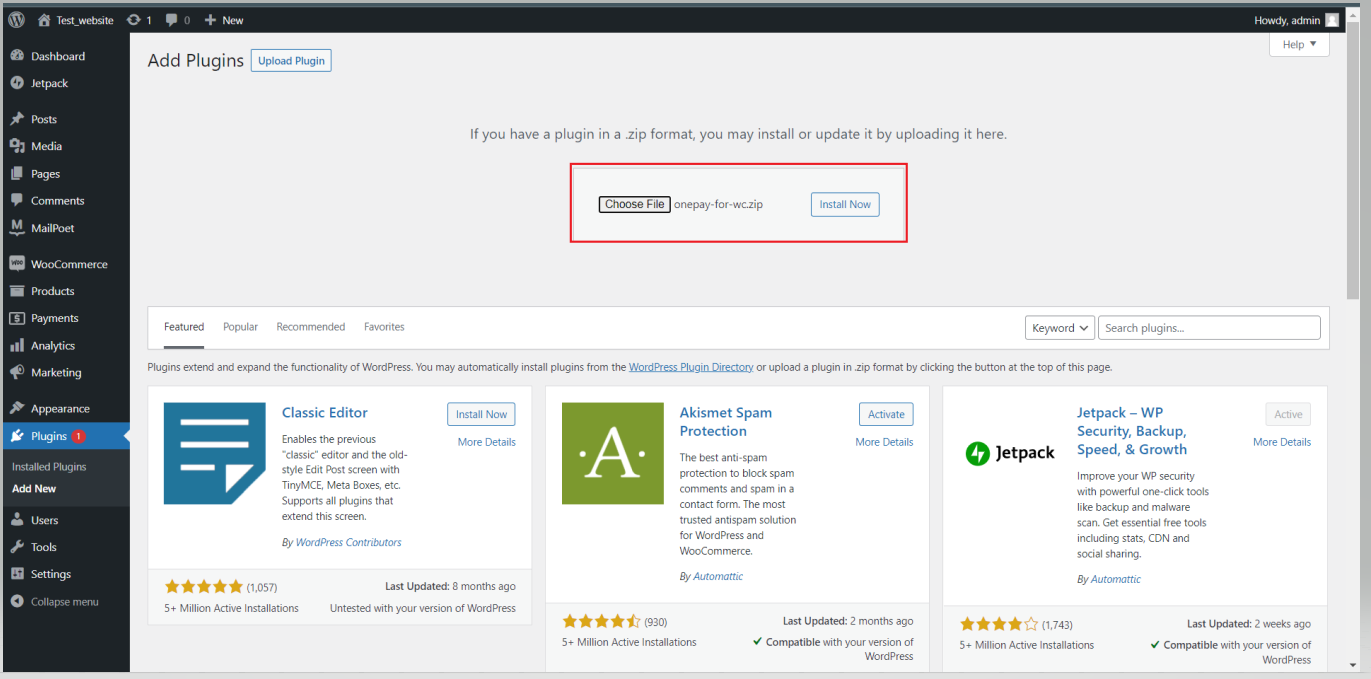
- To create new Plugin in WordPress click on the Add new button

- On clicking the Upload Plugin button, a pop-up will appear. Select the Nilon plugin file.
To download the plugin file, visit: https://wordpress.org/plugins/onepay-payment-for-woocommerce/
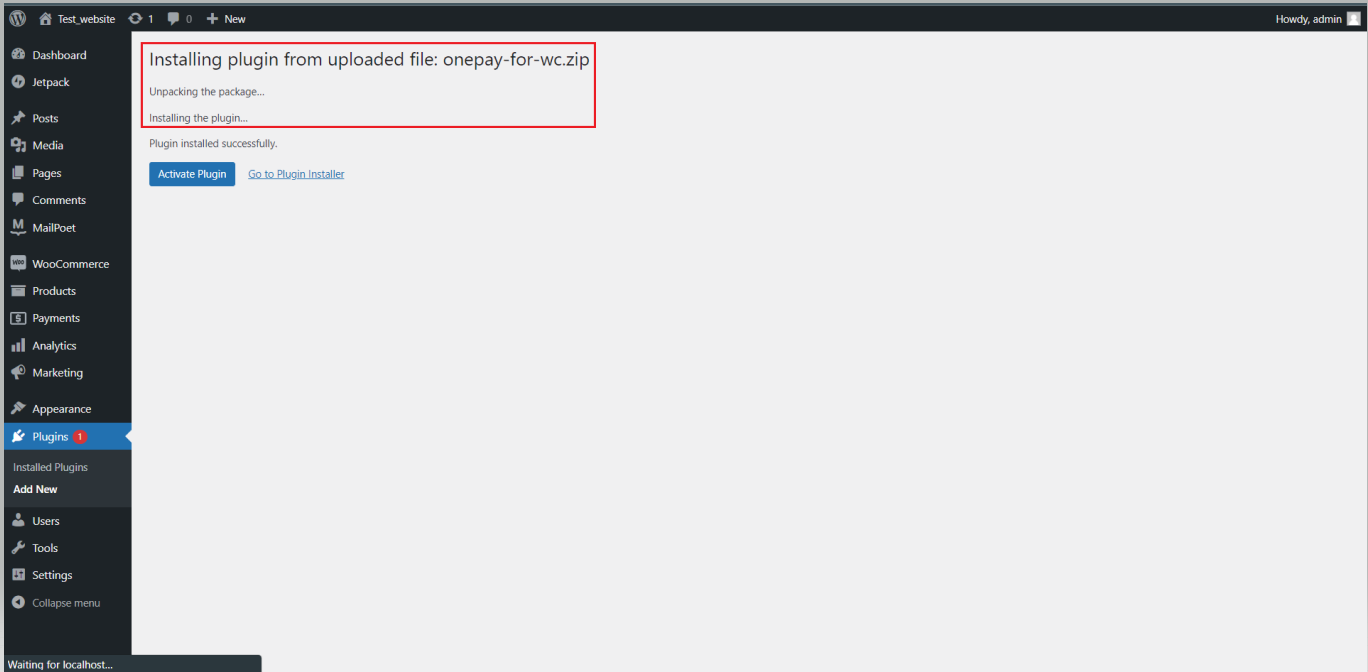
- Click on the Install Now button to install and activate the Nilon plugin.
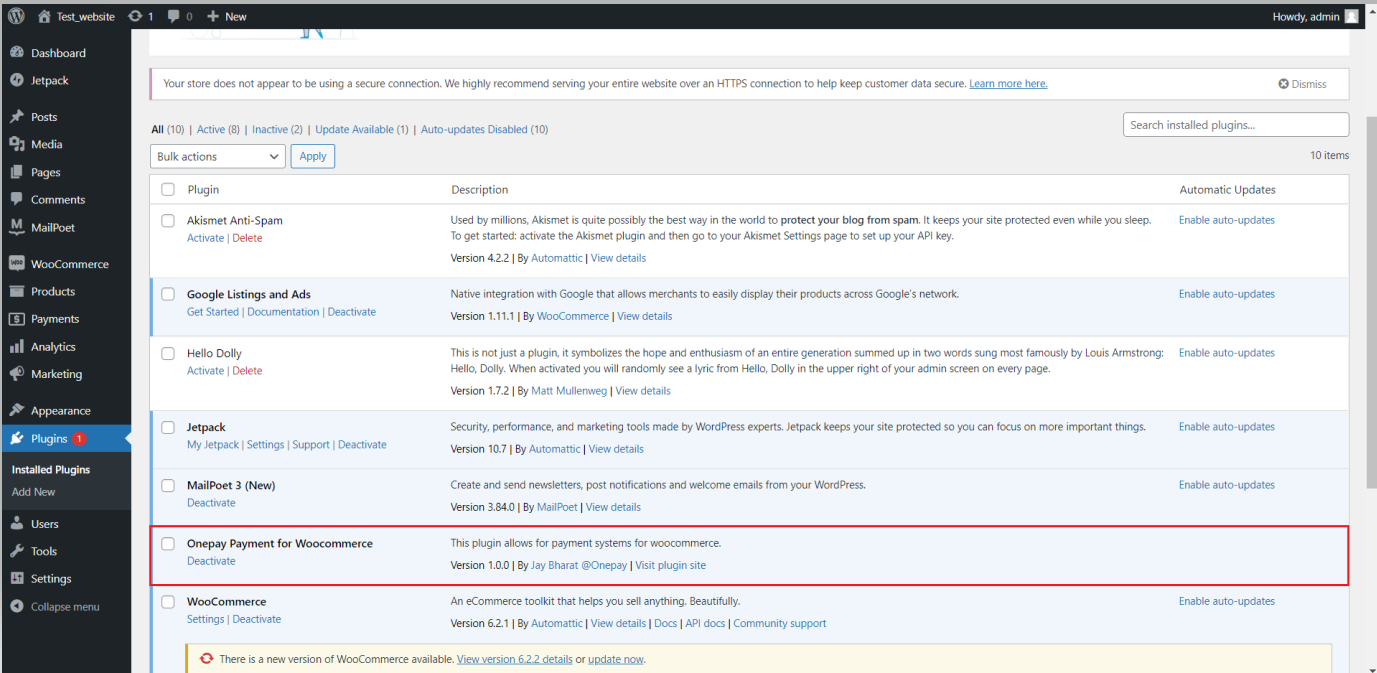
- Nilon plugin will appear in the list of plugin.
- To enable the Nilon payments to navigate WooCommerce ->Settings → Payments
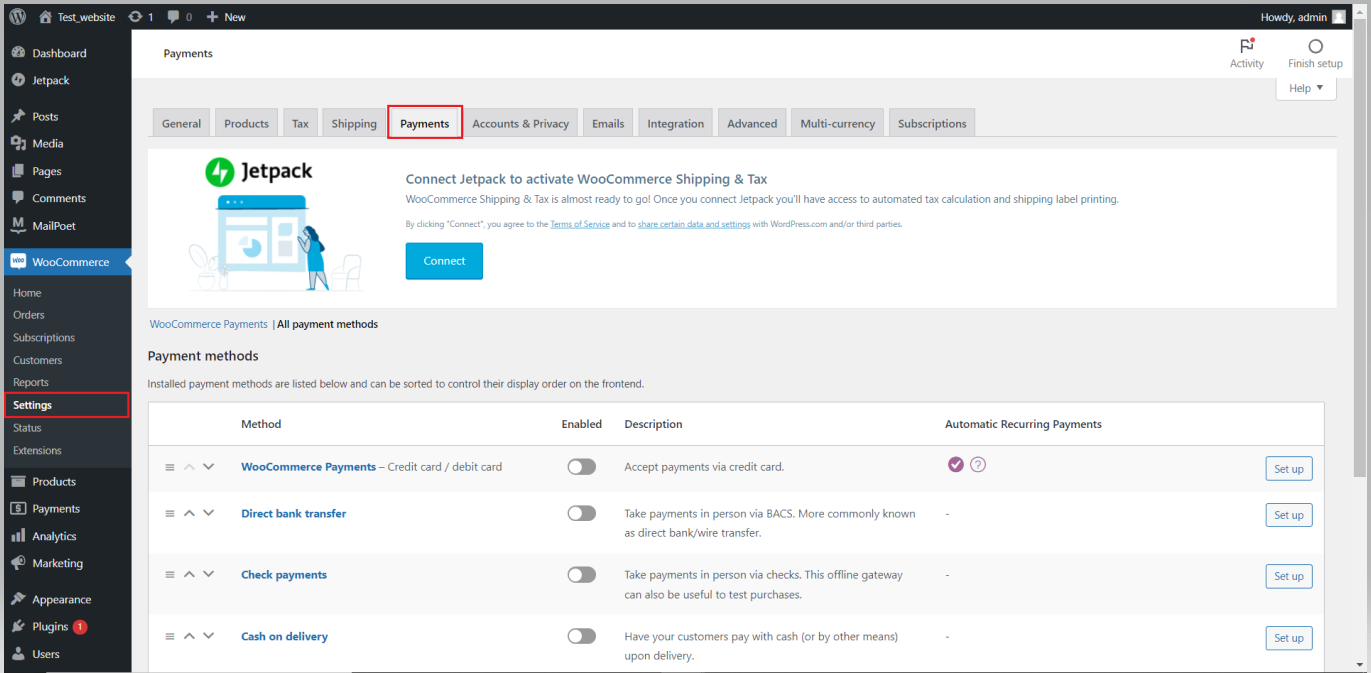
- Nilon payments will appear in the payment list
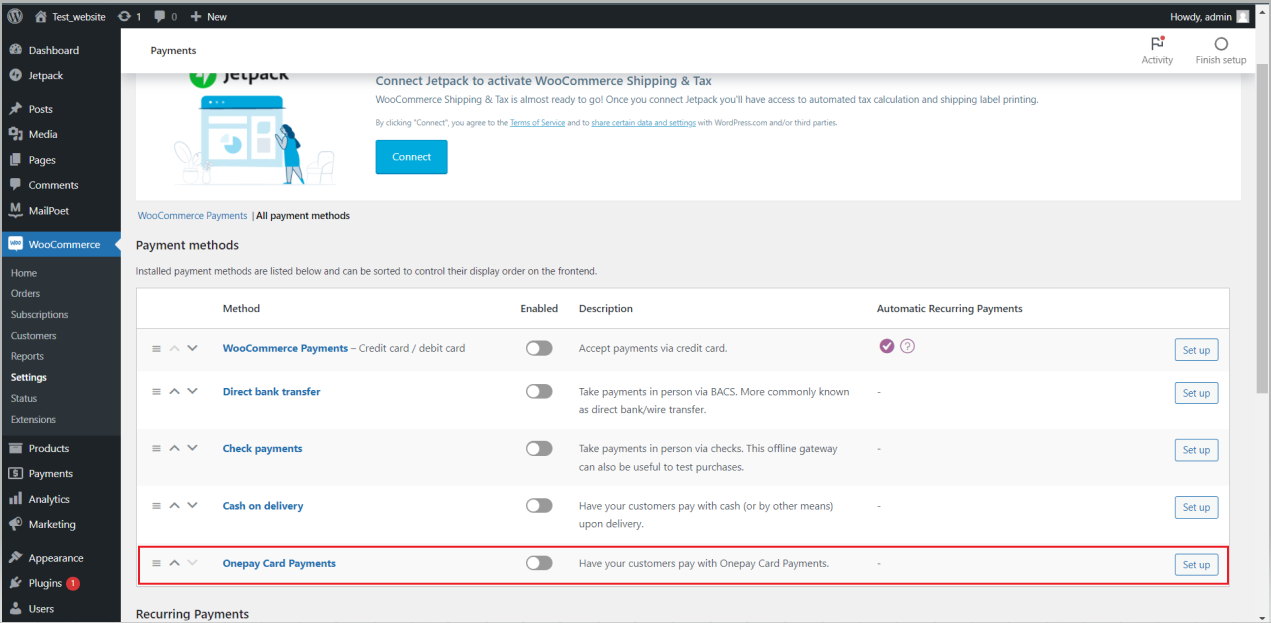
- Click on the setup button to update the settings

- All the payment settings will appear

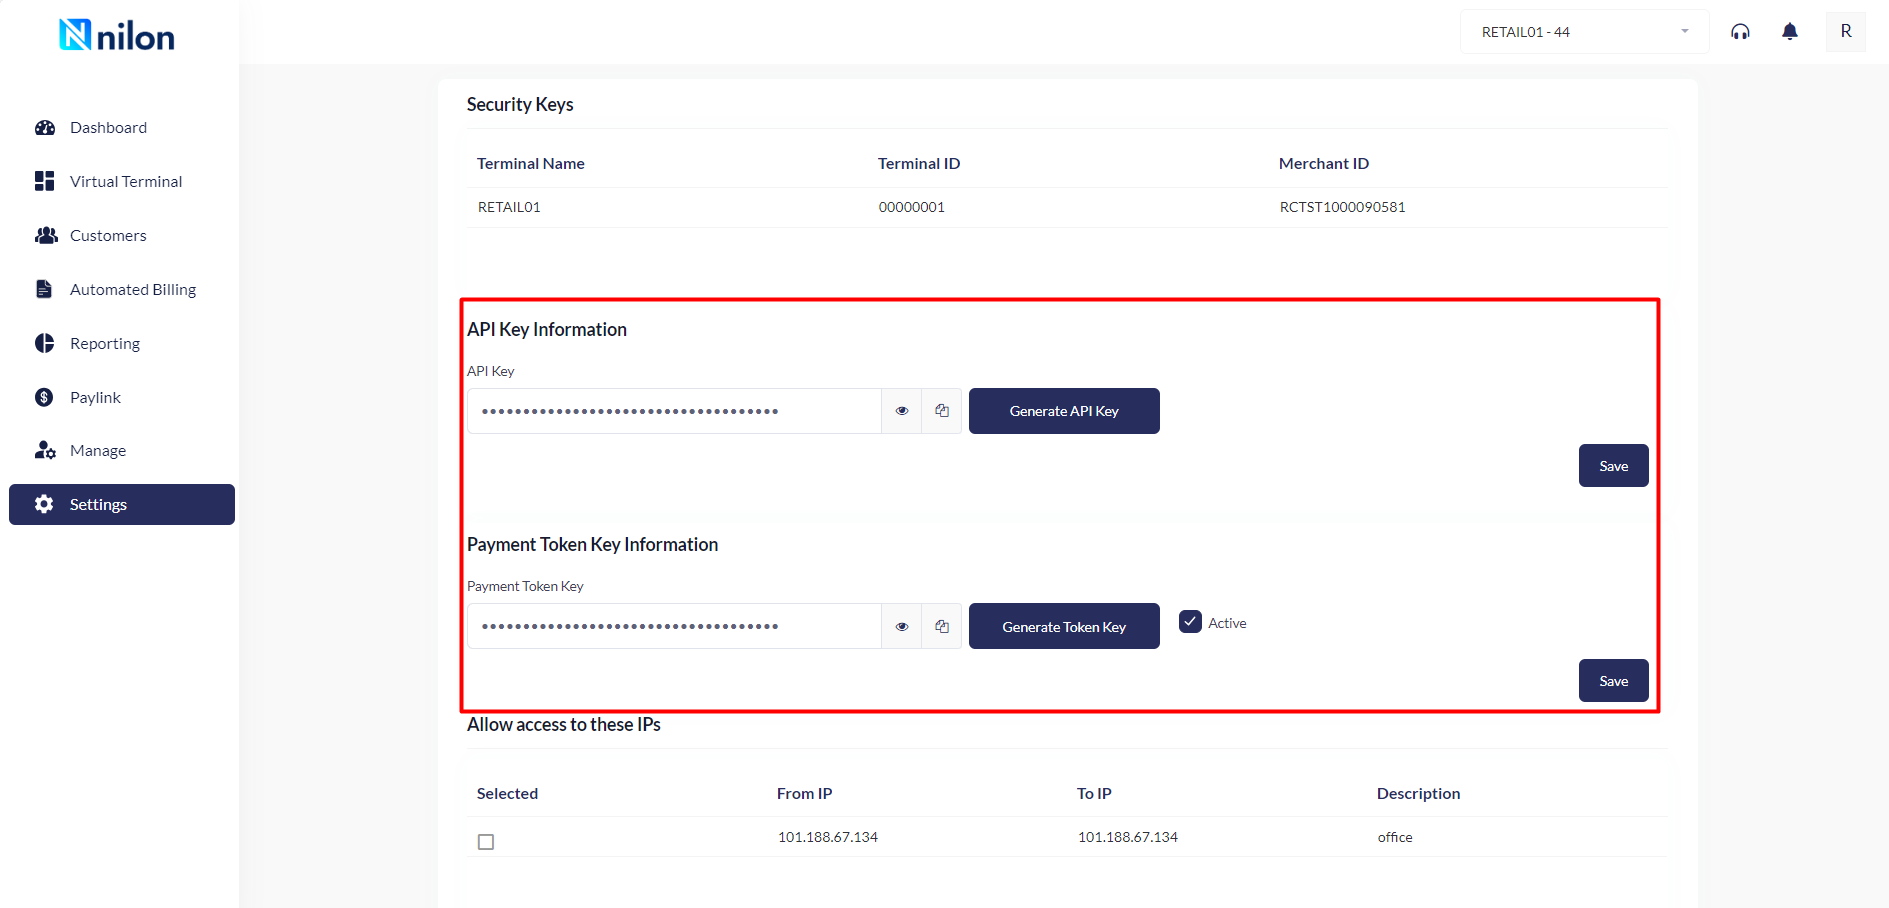
- To get API key and Custom form key, users have to log in to https://portal.onepay.com/
- Navigate to Settings->Security keys->API Key Information
- Navigate to Settings->Security keys-> Payment Token Key Information
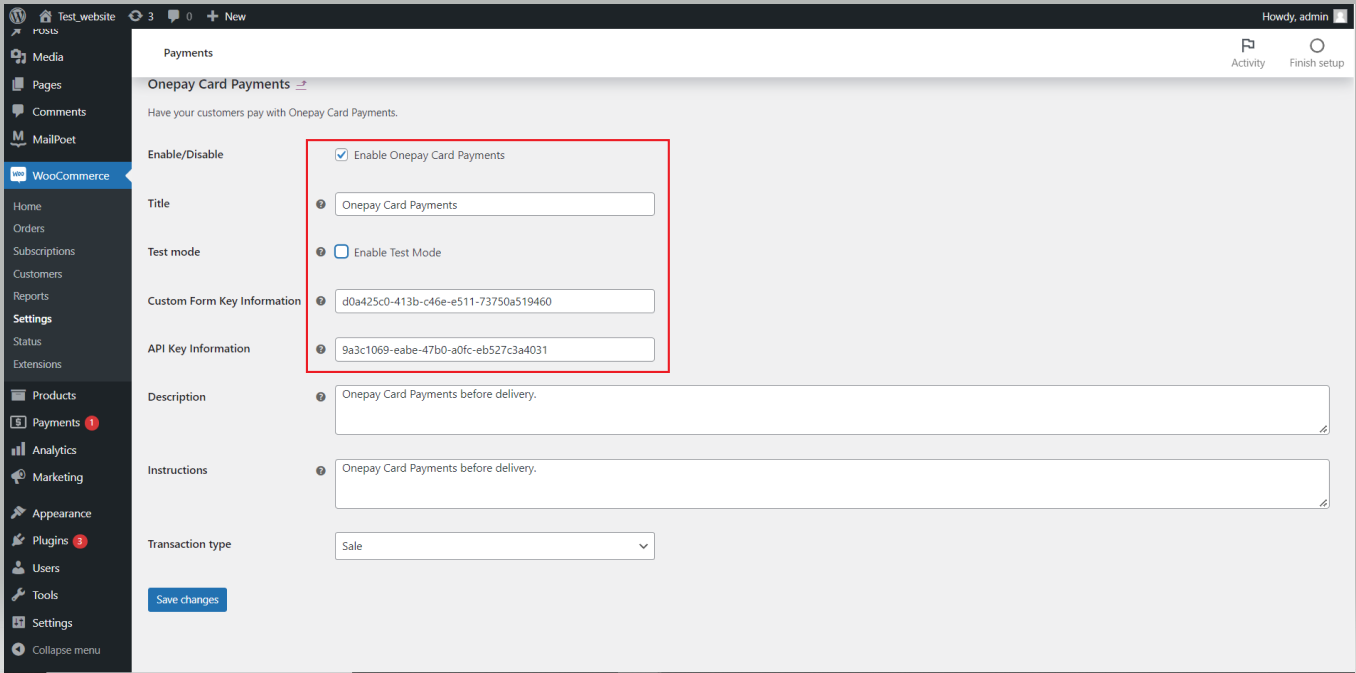
- Update the payment settings for Nilon
- Enable Nilon Card Payments
- Enable Test mode - This flag should be enabled only if validating in the test environment
- Custom Form Key Information
- API Key Information
- Transaction Type - Authorization and Capture and Auth only (Authorization only)
- Go to the Website and select the product
- Add the product to the cart
- Once the product is added to the cart, go to the checkout page and click on Proceed to checkout
Transaction Details
- Users will be redirected to the Payment page. To proceed with the payment, click on "Place Order" button
- Customer details - Customer name and shipping address
- Card details

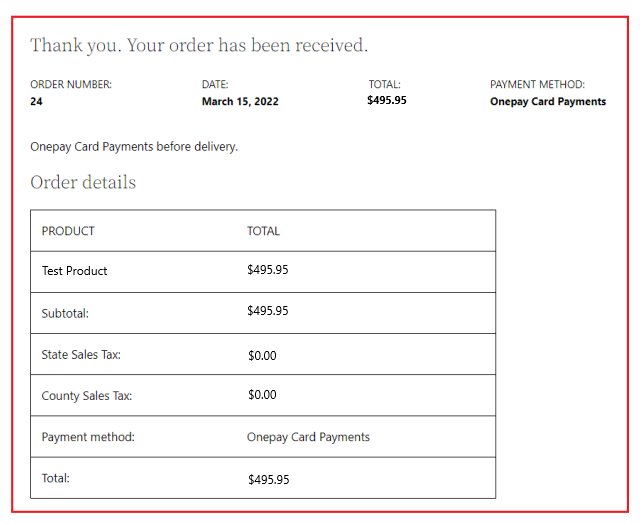
- Once the payment is successful, order details should be displayed